Engage Microsite (Hosted Chapter Website) Training Materials and Resources
Thank you for serving as an ISACA chapter website administrator ("site admin”)! Please read the following instructions before you begin your training:
-
Site administrators MUST read both the Content Management System (CMS) Training Guide and the Failure to follow instructions that results in the need for technical support may incur fees at the responsibility of the chapter.
-
The chapter website template provided by ISACA Global has recommended site architecture and page designs. DO NOT DELETE ITEMS (PAGES/WIDGETS) FROM THE TEMPLATE. If your chapter decides not to use one of the prepopulated pages or a particular widget on a page, site admin should only so future site admins are still able to reference the suggested template.
-
Instructional text is included on several pages of the chapter website template and is only visible to site admin. DO NOT DELETE INSTRUCTIONS. You may
-
There are two pages in the navigation (located under the "Member Only Content" button on the template) for site admin and chapter leader resources. These pages are only visible to those groups respectively. DO NOT DELETE.
-
If your chapter will be using the Engage hosted website for recording events in Event Manager only, you may skip the rest of this guide and access the
-
Please bookmark site admin training guides and refer back when making edits or updates to the site.
REMINDER: Any mistakes that require the assistance of the vendor to fix may result in a fee which will be deferred to the chapter before correcting. This is uncommon and should not be an issue for anyone properly trained or who refers to these instructions for managing a site.
Suggestions for improvement or questions about managing a hosted chapter microsite should be directed to chaptersiteadmins@isaca.org. Please thoroughly review training before contacting as most questions are answered here.
CMS Training Guide
Resources
Frequently Asked Questions
- Who can I contact for help with my website or events?
- Who are my site administrators? How do I update permissions?
- Who has access to my chapter website?
How To | Top
Access Content Management System (CMS)
All web editing through the content management system (CMS) begins with the site admin toolbar. The toolbar appears across the top of every page a site admin has permission to edit on the chapter website. The options that should appear are Edit Page, Edit Navigation, Site Options, and Community Settings. The CMS is accessed through the "Edit Page" and “Edit Navigation” buttons.

Site Set Up | Top
Contact Us Form
The Contact Us page opens a form that will allow all site visitors to submit an inquiry to an email address designated by the chapter. Chapters are required to add an email address; it is recommended that the address is a general mailbox to ensure continuity between chapter leader transitions.
- Log in to your site and open the CMS by clicking the Edit Navigation button from the site admin toolbar at the top of your screen.

- Click “Site Setup” at the top.

- Click “Contact Us” – the last option across the top of the Site Setup page. It is critical that you do not edit any other tabs in the Site Setup section.

- Enter your chapter name in the "Name" field.

- Enter a default email address – this is the only required item and it is the only area not visible to site users. This is the email address where the message will go after someone sends a message through the Contact Us form on your website.
- Helpful Tip: It is recommended to use a generic chapter email address (or administrator if the chapter has one) so that it does not have to be updated with each new volunteer term.
- "Enable Email Form?" should always be toggled to "Yes" to display the form on the Contact Us page for site visitors to easily submit their inquiry. DO NOT CHANGE.
- Scroll to the bottom of the page and click “Finish” to save changes.
- Check the Contact Us page on your website by sending a test message in the form.
Updating Social Media Icons
Adding your Chapter's Privacy Policy
Update Copyright
Editing and Adding Webpages | Top
Locked Pages
There are certain pages that are managed by ISACA Global and are unable to be edited:
- About ISACA Global
- ISACA Member Benefits
- Chapter Leader Resources
- Site Admin Resources
- ISACA CommunITy Day
- ISACA Global Volunteering
- ISACA Mentorship Program
- SheLeadsTech Program
- Credentialing
- Career Resources
Create a New Webpage
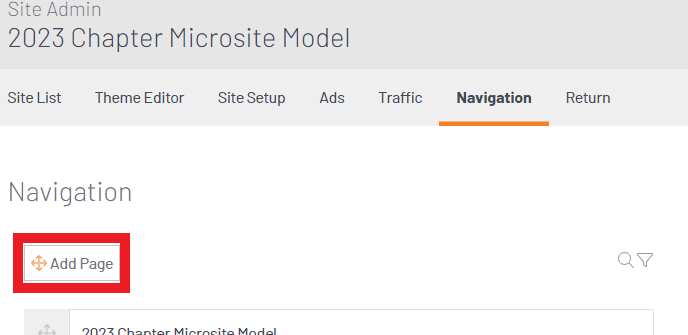
- Open the CMS with the "Edit Navigation" site admin button.

- Click the “Add Page” icon at the top of Navigation Page the and drag it to the navigation level where you want the new item to live.
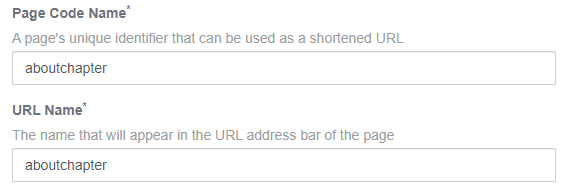
- BE SURE TO UPDATE THE PAGE CODE NAME and URL NAME to match your Page Title using no spaces or with dashes in the place of spaces. (ex. About Us becomes “aboutus” or “about-us”.)
- If you do not update these will stay as “new-page” and will be visible that way in the URL when visitors are on that page of your site. You do not need to add the full path, only the end result of this page. For example, for a page listing volunteer opportunities among other pages beneath a Volunteer menu, only add “volunteeropportunities” as the page code and URL name to create the path: engage.isaca.org/volunteer/volunteeropportunities
- Default page code and URL:

- Updated page code and URL:
- Give the item a Navigation Title and Page Title. The Navigation Title will appear as the button name in the menu, and the Page Title will appear at the top of the page unless you uncheck the “Show Page Title” option accordingly.

- Select Save > Publish to save the new page.

Create a Child Page
Page Permissions
When creating new or child pages, or designing current pages, it is important to remember to set/verify the Page Permissions. The permissions will automatically default to be viewed by everyone. You are able to create pages that are visible only to members.
1. Click on the page you wish to edit.
2. Under Page Properties at the very bottom you will see "View Permissions". Select "Edit".
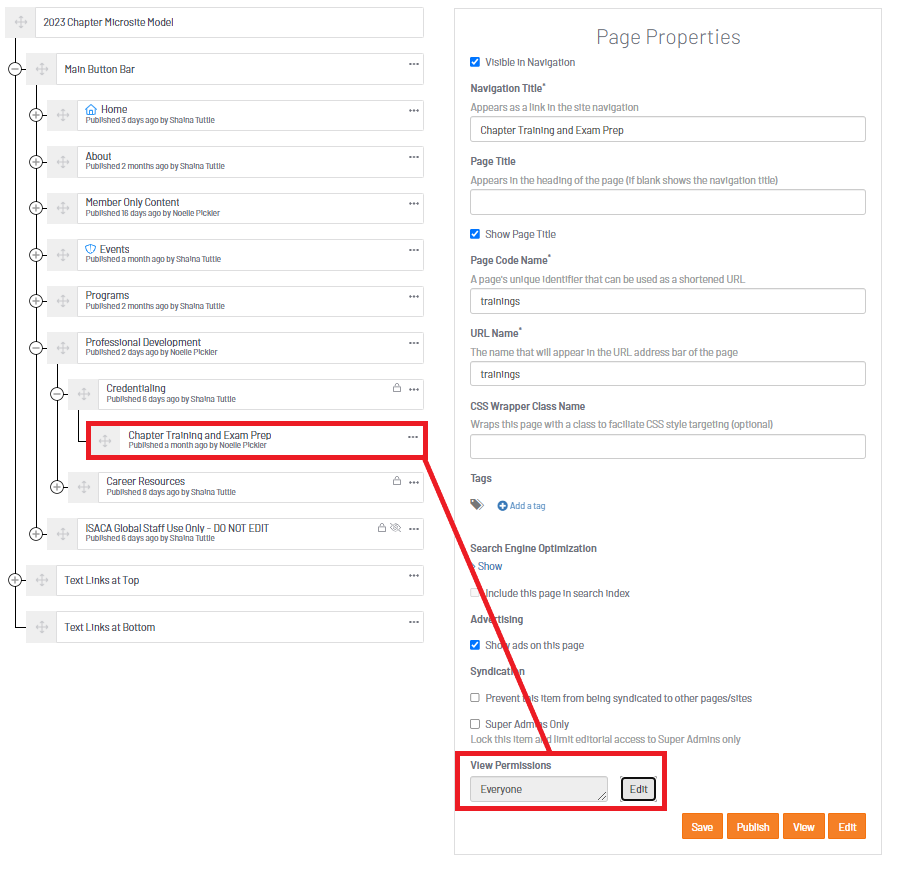
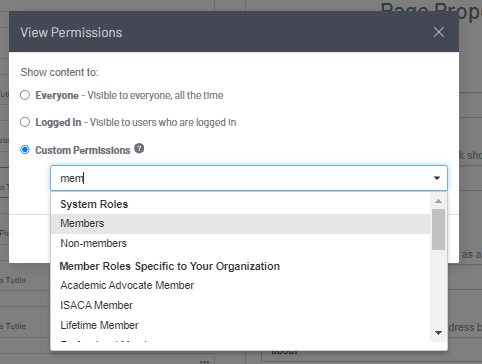
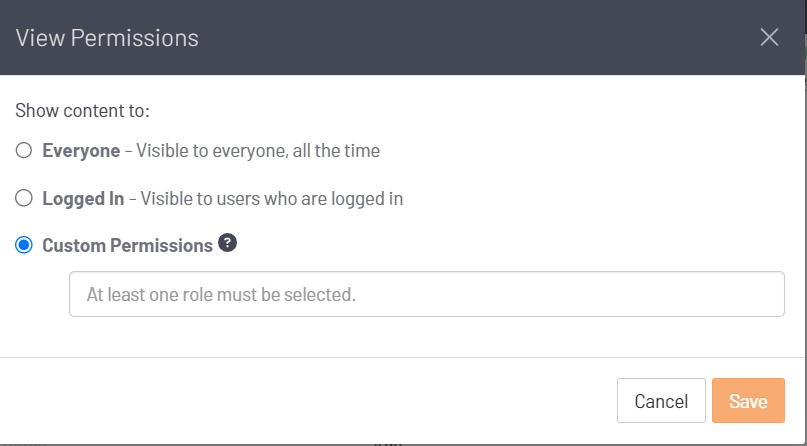
3. Set the permissions for the page accordingly. You can select for content to be shown to all site visitors ("Everyone") or set custom permissions for member only content ("Members"). Click "Save".
*NOTE: Other system roles will appear that are not applicable to your site. DO NOT SELECT. The page permissions available for chapter websites include "Everyone" (viewable by the public) and Members (viewable by members only).
4. Click "Save" and publish the page to finish updating page view permissions.
Move a Page
Click and hold the compass icon next to the desired page and drag it to a new location. Pages will appear in the chapter website navigation menu in the order in which they are set up within navigation on the back end.Be careful not to accidentally click too fast and drag and drop content to other sections.
Copy a Page
You can copy a page and all its content by selecting the ellipses “…” and clicking “Copy.” The new copy will be created as a draft. You can then edit as needed and publish the page.

Hide/Archive a Page
If you are in the processing of adding content to a page, or your chapter will not use a specific page, or if a page is only relevant during certain times, it should be hidden from navigation. Users should not be able to view pages that are under construction.
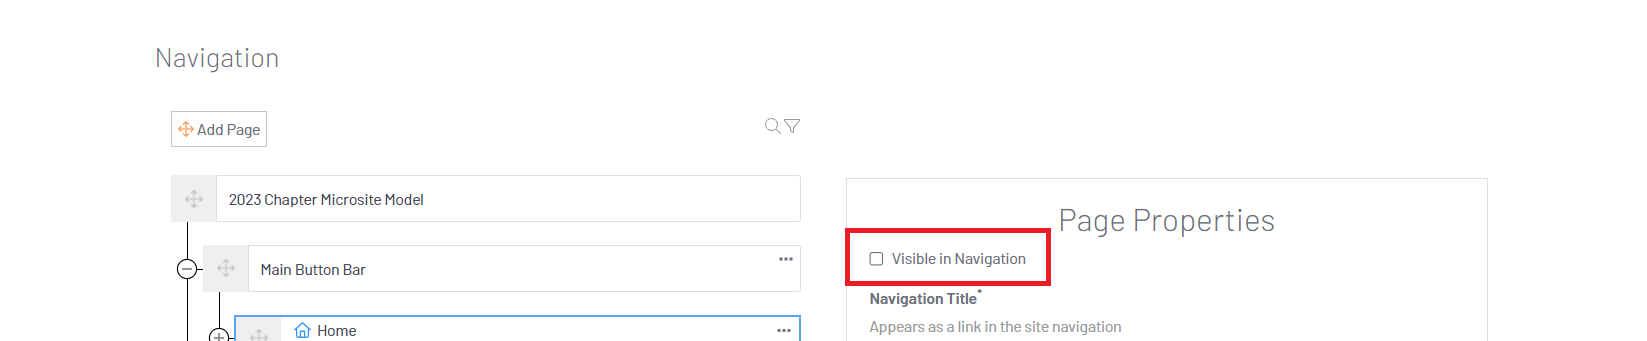
To hide a page, click the “Visible in Navigation” box so that it is not checked. The page remains active if someone has the URL directly to it, but it will not be found within the website navigation.
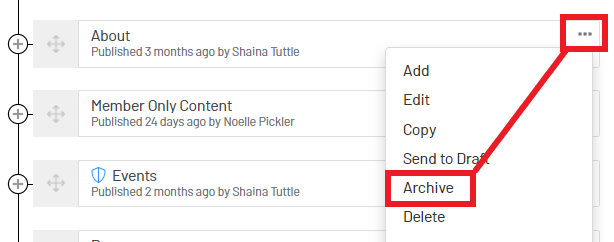
If you no longer need a page, but want to keep the content for your records, you can archive a page. This will remove it from the navigation, but site administrators will still be able to access the content within the CMS. (For example, this can be useful for pages related to annual events where you want to show the most recent event but not lose historical data that the site admin can reference.)
To archive a page, click the ellipses “…” and select “Archive.”
You will be able to locate an archived page in the future by clicking the filter at the top and clicking Archived > Apply under “Page Status.”

Add Content to a Page | Top
Add Content Rows
Add HTML/Text
Add a Hyperlink/URL
If you create a new page in the navigation that you would like to automatically redirect elsewhere, follow the steps below.
If you simply want to include a hyperlink within content on your webpage, see “Add Page Content” and "Add HTML/Text" sections to place an HTML Content item on the page. Click on the hyperlink button in the WYSIWYG editor to link to a file or webpage.
- Add one content row to the top of the blank page.
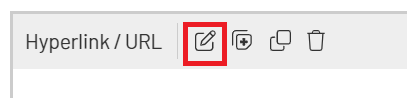
- Drag the “Hyperlink/URL” content item to the empty content row block.

- Click the “Edit” icon to configure the item.
- Add the URL you want to redirect to in the “URL or Page Code” field and check the box to open the link in a new window if desired. *Helpful tip: If the URL you are adding takes the site visitor to a new site, always check "Open link in new window".

- Click "Save" and publish the page. Do not add any other content to this page.
File Upload
Save and Publish
Widgets | Top
Widgets
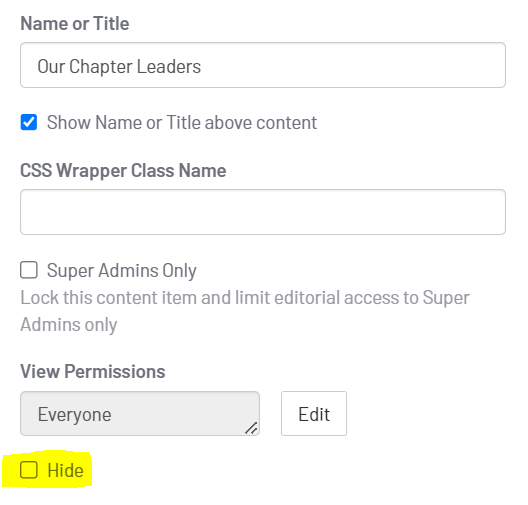
Widgets are placed on pages and used throughout the site as part of the website template. If your chapter will not use a specific widget, you can hide the widget as pictured below. Click on the widget you want to hide, access the Properties in the right menu, and check "Hide". Do not delete the widget from the page. 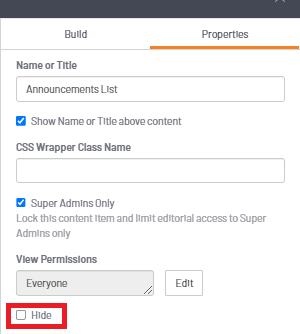
Review the view permissions of the widget by selecting the Widget > Properties > View Permissions.
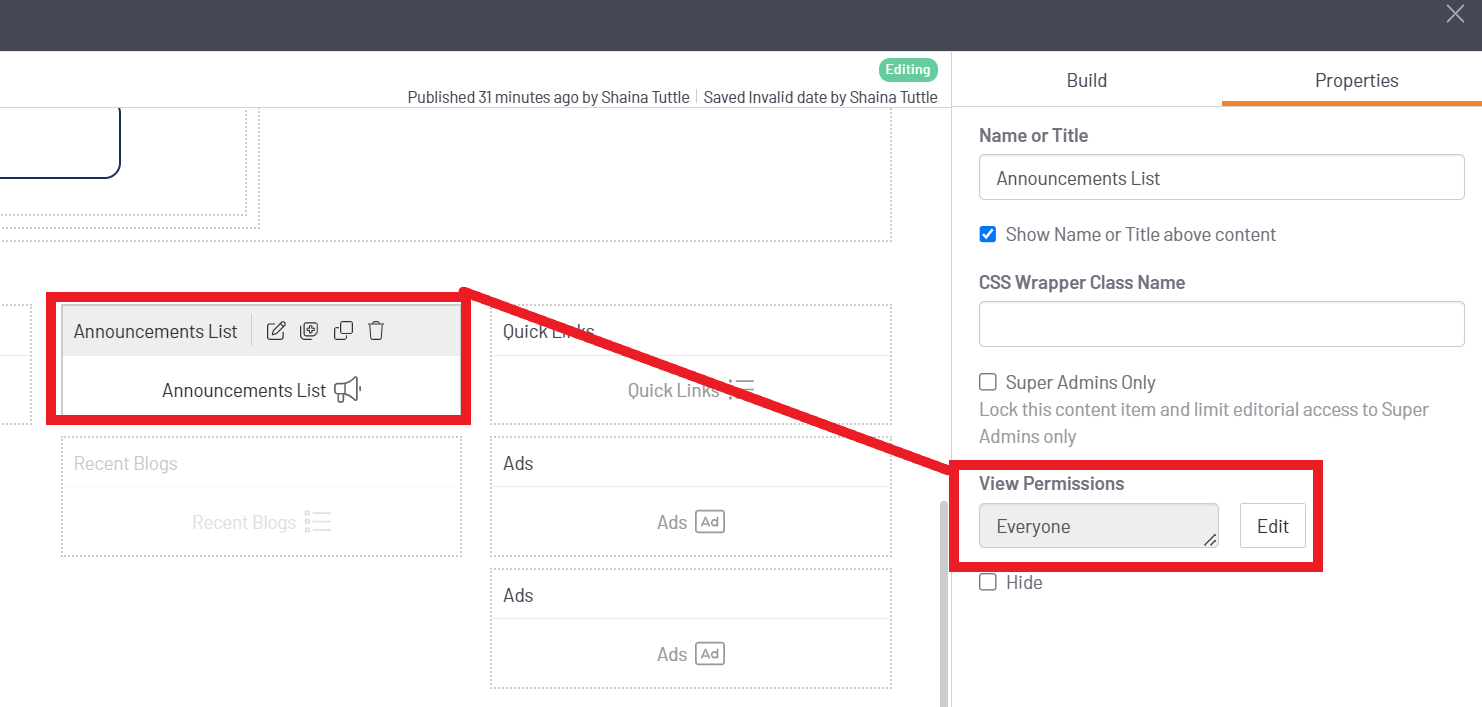
If needed, review and update the permissions and click "Save".
The usage and settings for various widgets placed on the chapter website template are described in the section below.
Community Leaders (Chapter Leaders) Widget
The Community Leaders Widget will display all active Chapter Leaders on your Chapter Leader Roster. When any updates are made to the Chapter Leader Roster, it will automatically update the widget. This widget is located on the About Our Chapter page on the chapter website template. No edits need to be made to the widget, the widget will configure to your chapter site automatically.
- Board members must upload their headshot on their Engage Profile and set the viewing permissions for that field to "public" or they will appear as a grey avatar.
- Chapter Leader titles will display as our default code in the member database and not as the title you have submitted to chapters@isaca.org or that displays in the Chapter Leader Portal. Integration limitations will not allow editing of these titles on the hosted chapter sites.
- Chapter leaders will appear in alphabetical order and limitations prevent reordering.
If you do not wish to use the Community Leader Widget there are other ways to display your chapter board. Please hide the Community Leader widget on the page, do not remove the widget..
Other recommendations for displaying the chapter board:
- Manually enter as an HTML item and update as needed. You may link individual names to Engage profiles to allow site visitors to learn more about the leaders (to the extent they have made their profile visible.) Learn about profile privacy settings.
- Do not display leaders, but instead list basic contact information.
- Display a static image that includes names, titles and photo but will not link to profiles.
Announcements Widget
The Announcements List Widget has been placed on the homepage of your chapter site as part of the template. This widget's intended use is for quick, short updates from the Chapter that are viewable by the public
(default view permissions have been set to "Everyone"). The announcement widget overflows onto the Chapter Announcements page on the website, accessible from the navigation.
1. To add an announcement, click "Add" on the widget OR on the Chapter Announcements page.

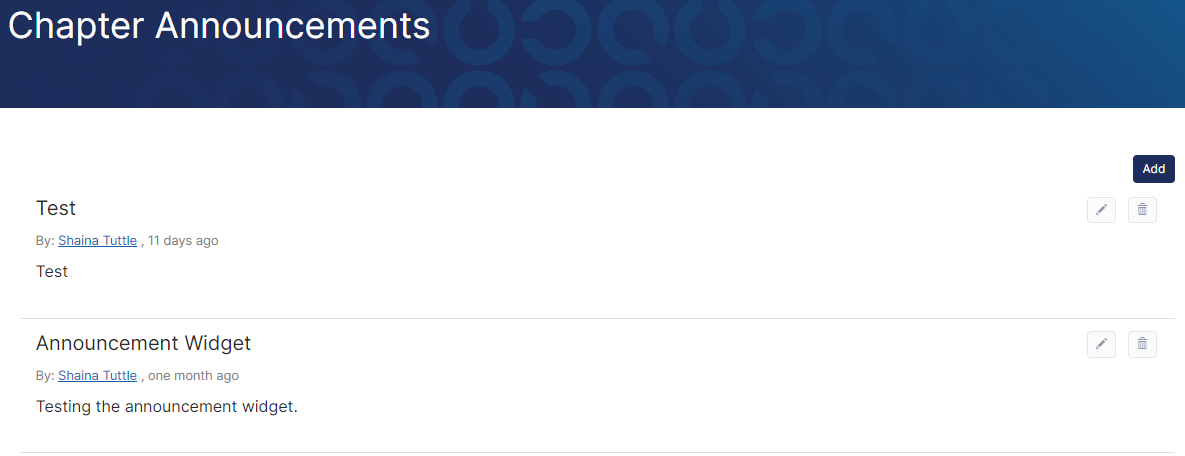
2. Fill out the form adding announcement details, then click "Save".

3. Confirm your announcement posted correctly.
*NOTE: As part of the provided template, the announcement list widget on the home page is configured to show 5 total announcements posted within the last 365 days. The entire announcement feed can be accessed from the Chapter Announcements page.
Blogs List Widget
The Blogs List Widget is set up on the chapter website as an option for chapters to share newsletters, a President's Message, or other updates from the Chapter that are more extensive than an announcement.
This widget is placed on the Chapter News page of the website template provided by ISACA Global. Blog posts are managed from the front end of the site.
*IMPORTANT NOTE: The Chapter News page permissions are set to be viewable by members only. If you want the Blogs to be visible to all site visitors, you should move the page from under the Members Only Content navigation button to another area in the navigation, AND update the page permissions.
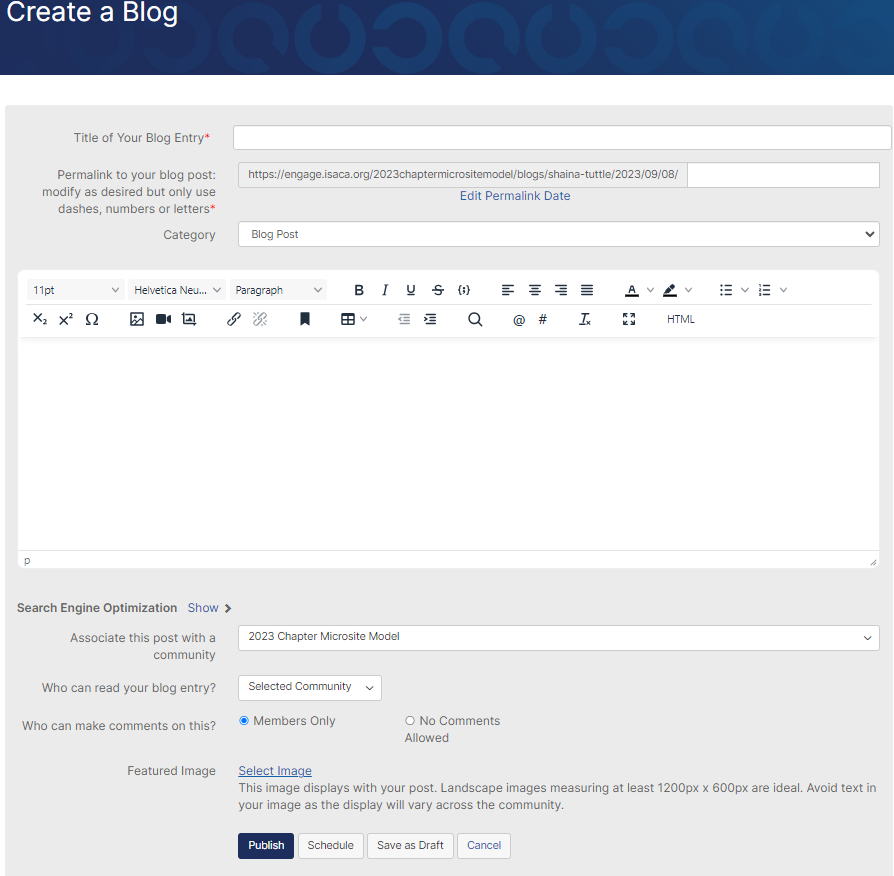
Click the "Create a New Blog Post" button to create a new entry and input all information required. Remember, this section is suitable for longer form pieces of content like newsletters.
4. You
do not need to associate the Blog to a Community. This will default to your Chapter.
5. "Who can read your blog entry?" - You are able to control what audience you want to be able to view a specific blog entry,
however, this widget is currently placed on a page with Member-Only page permissions. The page view permission will override the setting designated at the blog level. Updating who can read your blog entry to everyone
will not function properly if this is on a Member-Only page. Move the widget to a new page and update page permissions if you want Blogs to be visible to all site visitors.
Featured Cards Widget
The Featured Card widget makes it easy to create high-quality hero images, banners, or other card-based content with images, icons, text, and buttons. Featured Cards can be set up as one single image or a four card split. Once the Featured Card widget is placed on the desired page, it is managed on the front end of your site.  1. Add a content row to the page on you want the Featured Card to display then drag and drop the Featured Card widget to an empty row block.
2. Click Save > Publish to save the changes.

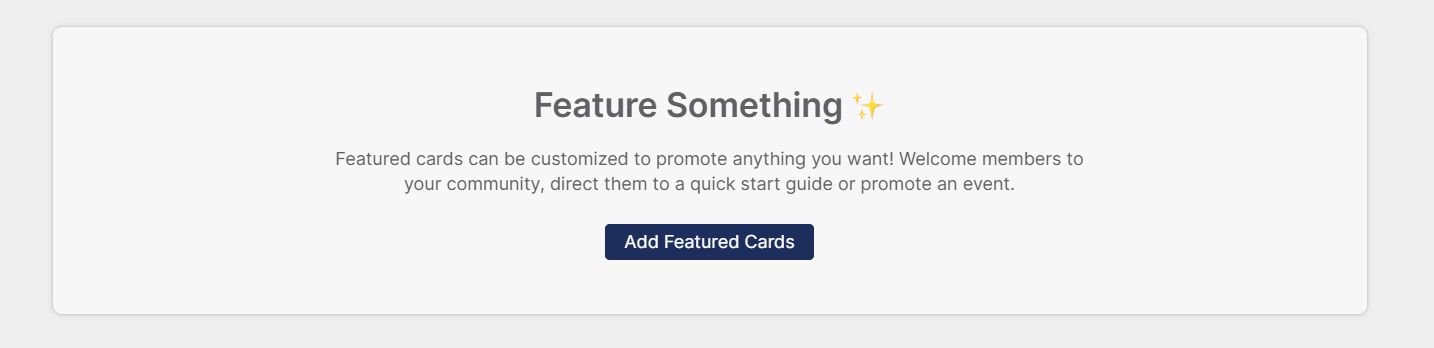
3. This is how the Featured Card widget will appear on the front end of the chapter site. Click "Add Featured Cards" to finish setting up the widget.
4. Select the number of cards and the desired layout for how you want the Featured Card to be displayed. 
5. Based on your selection, add one or multiple images in the "Add Visuals" section.
Recommended image ratios:
- Single-card layout, Banner Cards: 4:1 (at least 1200px by 300px)
- Single-card layout, Split Card and Hero Card: 2:1 (at least 1200px by 600px)
- Four-card layout: 4:1 (at least 1200px by 300px)
*NOTE: Images will crop and scale to fit the image area, and recommended sizes are not exact. DO NOT upload images that have text or buttons as they may not be readable. You can add text and buttons on top of the image within the Featured Card editor.
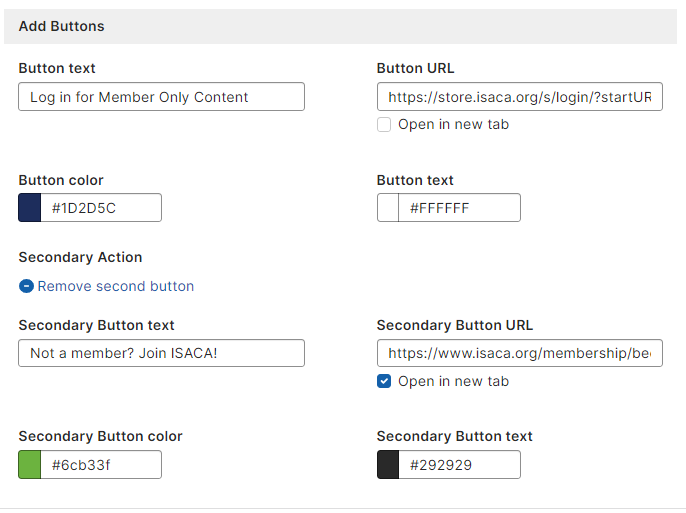
6. If needed, add a title and/or description that will display on top of the uploaded image. Choose a font color that will be readable on top of the image, for example if the image is dark in nature, choose a white font. Review and update as needed after publishing.
7. If needed, add buttons (up to two) that will link to more information, another webpage, etc.
Helpful tips: If you are linking to an external site from the Featured Card, make sure to open a new tab.
8. Once finished, select "Publish".
Events List Widget
The Upcoming Events List Widget has been placed on your chapter homepage with view permissions set to be viewable by the public. This widget is set to display up to 4 upcoming events, and feeds into the Chapter Events List page in the site navigation of the template, where all events will be displayed.
For more information on how to add an Event to your chapter site, please reference the Event Manager Training.
Community Slideshow Widget
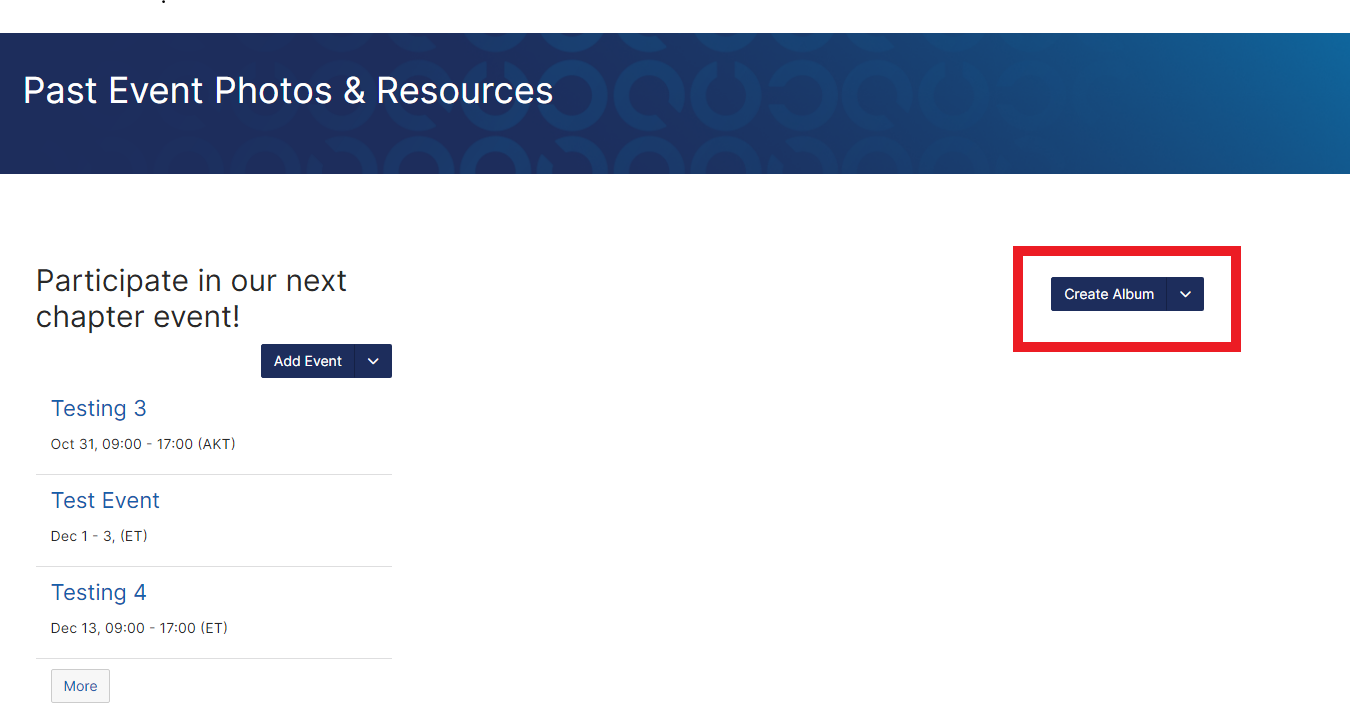
The Community Slideshow widget allows you to easily display chapter photos from past events, etc. Site Admins are able to create and display albums that chapter members are able to download. This widget is already placed on the Past Event Photos & Resources Page of the chapter website template.
1. Click Create Album to create a new album.
2. Create an Album Name and configure the slideshow settings (show thumbnails, allow image downloads, show image details, rotation interval.)
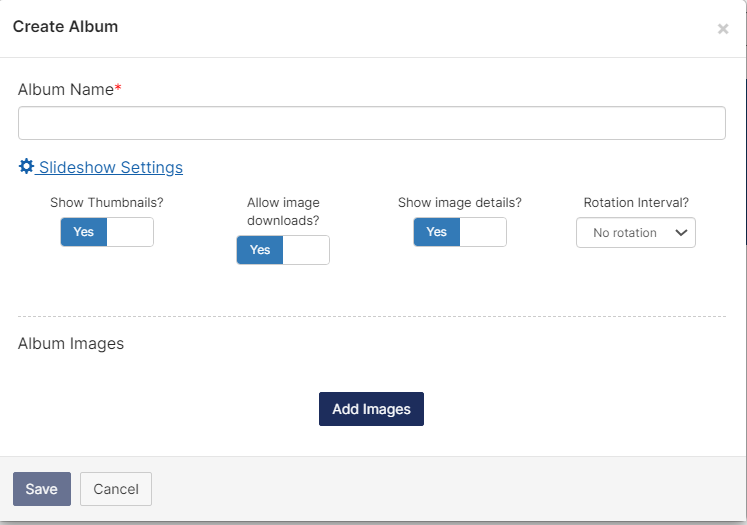
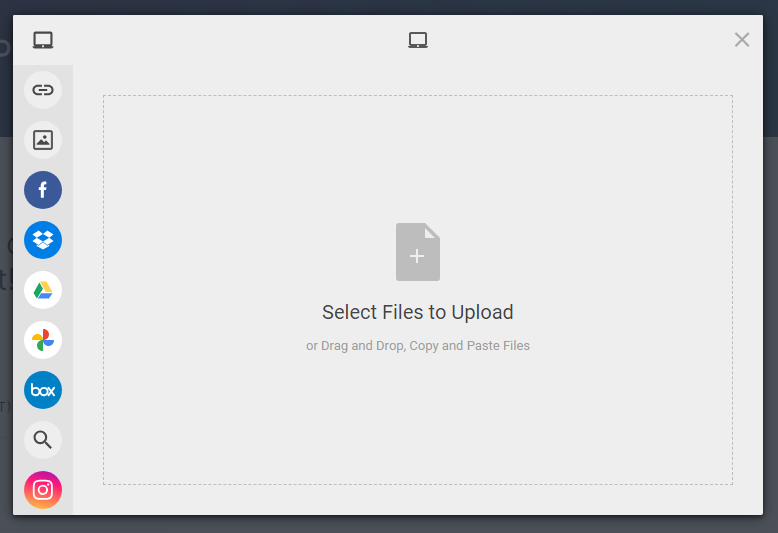
4. Click "Add Images" to begin uploading images to the album.
5. Review images and settings. Click "Save".
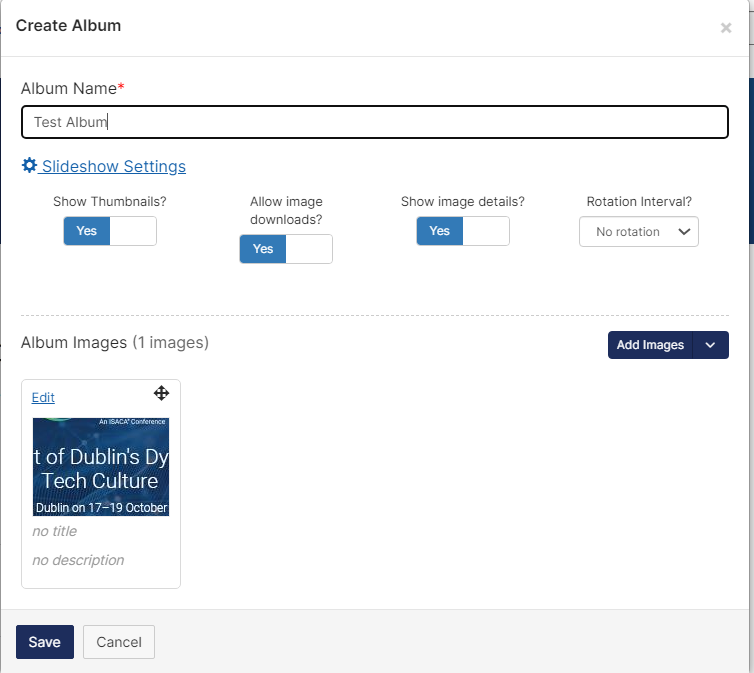
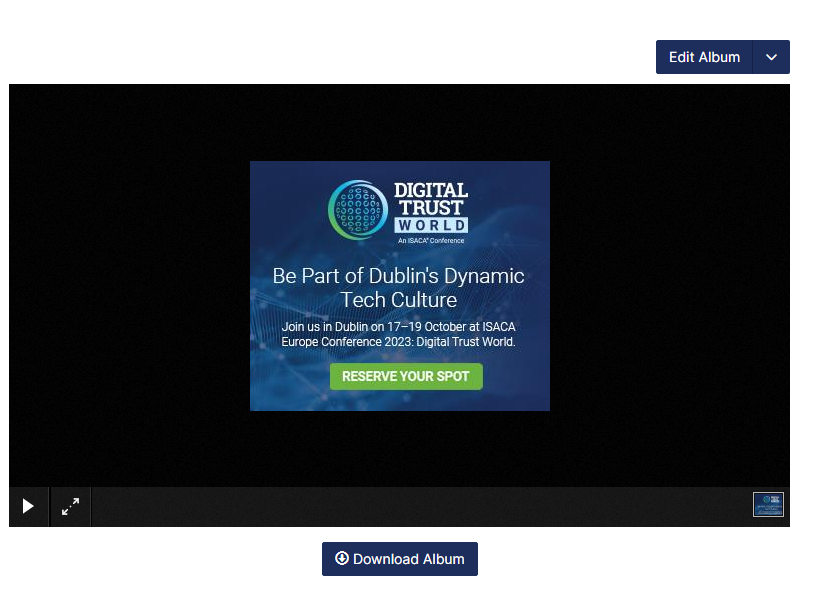
6. Verify that the photos are displaying correctly in the album.
Email Chapter Members | Top
This email tool enables chapters to effortlessly deliver important information and updates directly to their members. Some key features include the ability to attach files or send meeting invitations, facilitating seamless sharing of relevant documents and event details.
ISACA provides additional support by uploading the monthly Content Letter attached to the ChapterONE newsletter, ensuring that chapters have easy access to the latest updates which can be shared with their members. To further streamline communication, ISACA occasionally offers additional templates, such as Renewal Messaging. These templates are designed to help chapters efficiently disseminate important information while maintaining a consistent and professional approach in their communications.
By utilizing these resources, chapters can significantly enhance their engagement with members, ensuring timely delivery of crucial information and fostering a stronger community connection.
There are five different email segments you can choose from depending on the content of the message you are wanting to send.
- All Members – Sends to all active members of your chapter.
- Professional Members – Sends to all active members of your chapter who have a professional membership type.
- Student Members – Sends to all active members of your chapter who have a student membership type.
- RG1 Members – Sends to all active members of your chapter who have a recent graduate membership type within the past year.
- RG2 Members – Sends to all active members of your chapter who have a recent graduate membership type within the past two years.
- 1-2 Year Members - Sends to all active members of your chapter who have joined within the past 1-2 years.
*NOTE: This tool will only send communications to your current chapter members. All event information is still required to be submitted into Event Manager for chapter compliance.
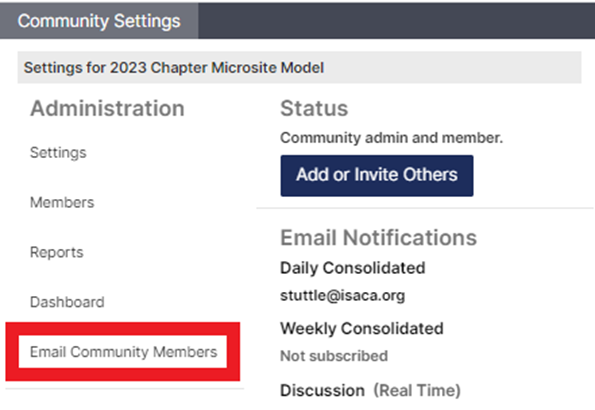
- Navigate to the site admin tool bar located across the top of your chapter site and click on Community Settings.

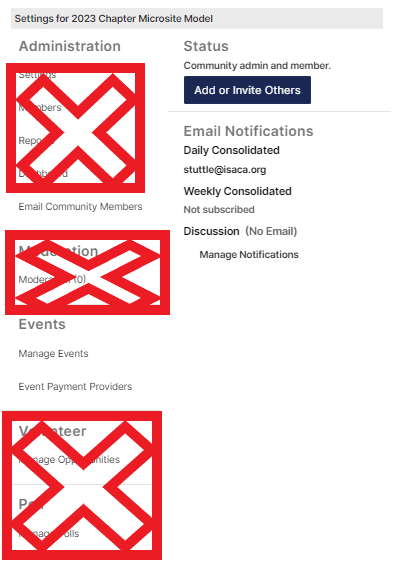
- Access the “Email Community Members” link. No additional settings are configurable by site admin. ONLY access the Email Community Members area.
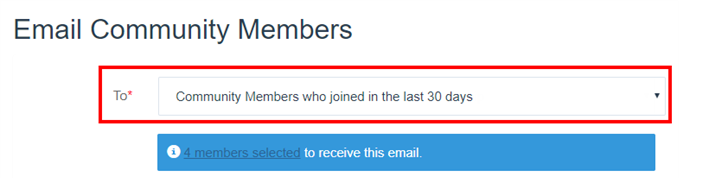
3. You will be taken to the page to send email communications. Select the group you wish to send an email to from the “To” drop down. It will show you a preview of how many members are expected to receive that correspondence.
4. Update the Community Admin Message when applicable.
5. Send Email.
Job Board | Top
Chapters can receive a personalized code that can be shared with employers, allowing them to post on the ISACA Job Board free of charge. The code permits a free 30-day posting that can be used up to 12 times.
If you have questions on the ISACA Job Board promo codes, please reach out to chaptersiteadmins@isaca.org.
Alternatively, chapters can continue posting local job opportunities directly on their chapter website.
You can view a step by step guide on how to post to the ISACA Job board here.
Library | Top
The Chapter Library is a great place to upload past presentations, photos from events, or other important chapter related documents that should be accessible to members. Different types of files can be stored in the Library, such as hyperlinks, webinar recordings, YouTube videos, Word documents, PDFs, PowerPoint files, images, etc. Below you will find tutorials on how to upload files to the chapter library. Only site admins are able to create and organize folders.
Upload Library File
- From your chapter website, click on Member Only Content from the navigation and select Chapter Library.
- On the Library page, click the “Create Entry” button on the right side of the page.
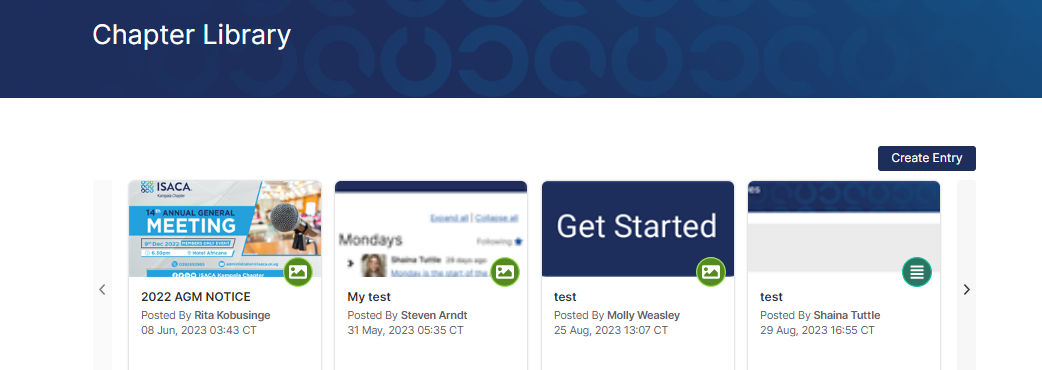
- From the Library Entry screen (below) enter the following information:
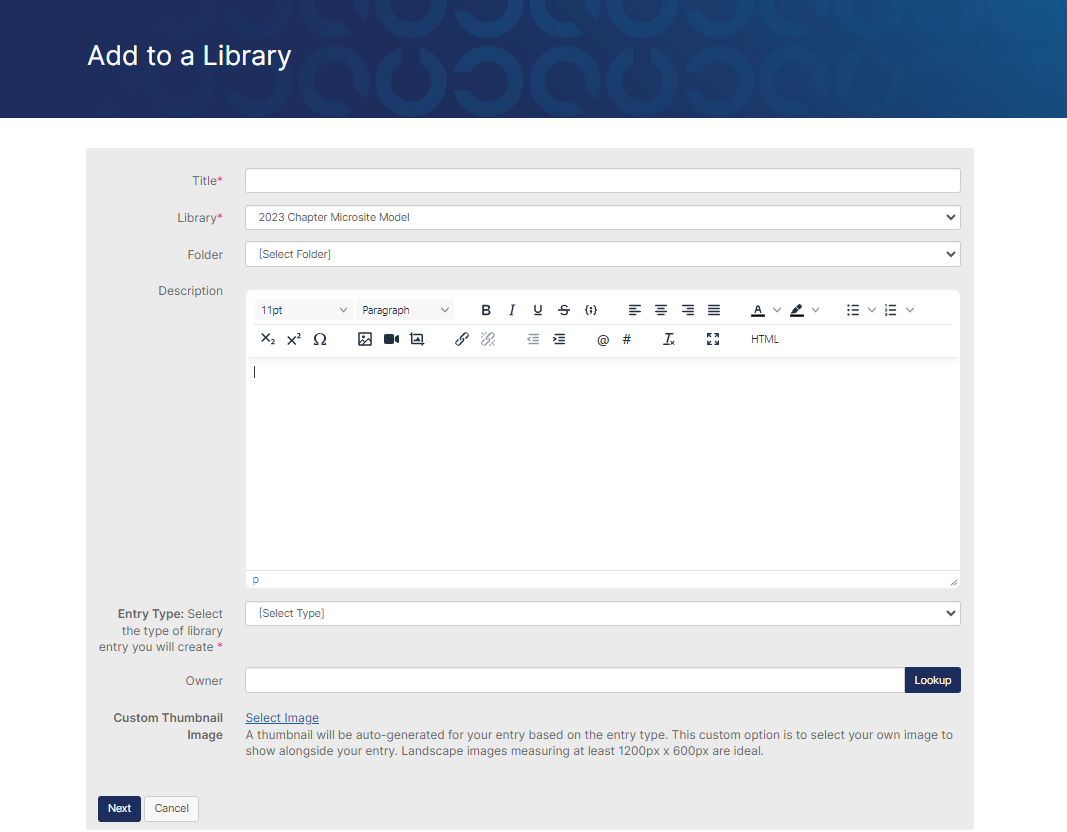
- Title – The document title should be descriptive for users reading the list of library entries to determine if it could be what they are looking for. This field is required.
- Library – This should default to the chapter website library. Confirm that the correct library is selected.
- Folder - Select the Folder you want to entry to upload the entry to.
- Description – Adding a description is optional but strongly recommended. It is helpful to users by providing more information about what is in the library entry.
- Entry Type – Specify what kind of file is being added. This field is required and determines the workflow for adding the content on the following screens. Select from:
- Copyright Licensed File – Similar to a Standard File Upload, but with an additional step asking the user to specify the copyright protections and allowed uses of the files as defined by Creative Commons. Jump to how to add a copyright licensed file.
- Hyperlink – A link to an internal or external web page. There are no actual files attached. Jump to how to add a hyperlink.
- Standard File Upload – Used for PDFs, Word Docs, PPT Files, photos, etc. This is the most common type used. Jump to how to add a standard file upload.
- Webinar – An embedded video linked from a third-party provider such as Adobe Connect or GoToWebinar. This is to display on-demand webinars, not live stream. Jump to how to add a webinar.
- YouTube Video – An embedded video from YouTube displayed in a multimedia player. Jump to how to add a YouTube video.
*NOTE: The maximum file size for any document is 1 GB. Most file types are supported.
Copyright Licensed File
The process for uploading copyrighted files is similar to a Standard File Upload, but has an added step requiring licensing and permissions:
1. Select Copyright Licensed File(s) as Entry Type. Choose and upload your file then select Next.

2. Complete the Licensing page then select "Finish".
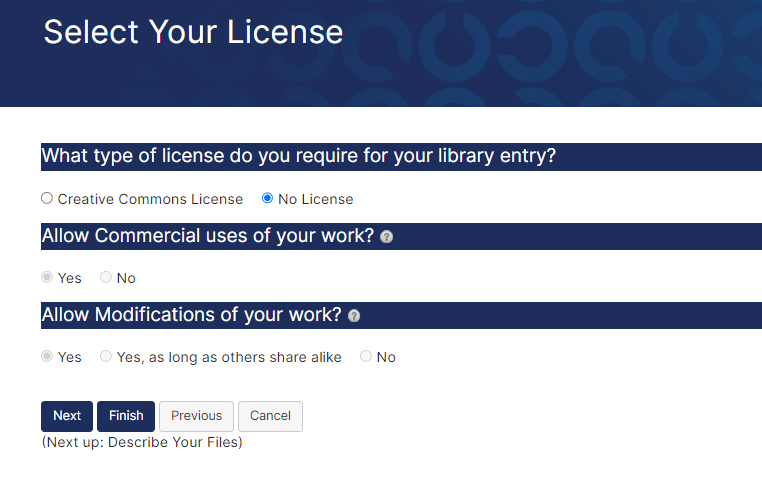
The document is now shared in the library.
Hyperlink
Hyperlinks can be added to a library to bookmark relevant web content.

- When adding a link, make sure to include the entire URL (beginning with https://).
- It is optional to give the link specific hyperlink text so users will see that wording instead of the raw URL.
- Click “Finish.” The document is now shared in the library.
Standard File Upload
Standard files are documents with nearly any extension, e.g. .pdf, .doc, .xls, etc. This is the most common file type.
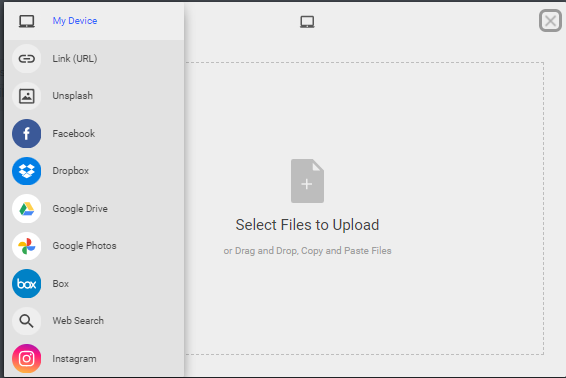
1. Select Standard File Upload for your Entry Type. Click on "Choose and Upload".

2.You can drag and drop files from your desktop into the box or select "My Device" to browse files that are on the computer you are using. Upload your files then select "Next".
3. Click “Next” to add titles and descriptions for each of the files (if multiple files were uploaded) as shown in the image below.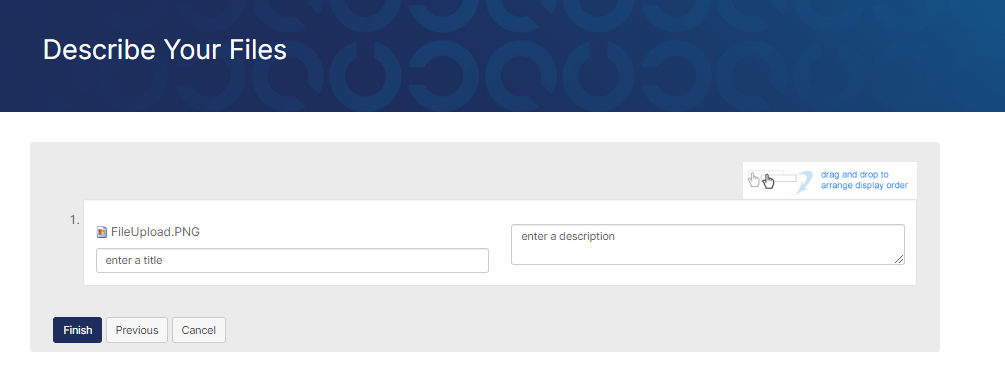
4. Finally, click “Finish”. The entry is now shared in the library.
Webinar
Recorded webinars (trainings, tutorials, etc.) may be uploaded, which display as an embedded video in the library entry. This is not a functionality for live streaming events.

- Use for recorded webinar uploads from sources such as Zoom, Adobe Connect or GoToWebinar.
- Enter the URL to the webinar, the running time and the names of the presenter(s).
- Click “Next” to categorize your webinar by adding tags (tags are optional) and click “Finish” when you are ready to add the file to the library.
YouTube Video
YouTube Videos can be uploaded to the Chapter Library.

- Inserting a YouTube video URL will allow for a YouTube video to be embedded and accessed within the library rather than taking users off your site.
- On YouTube.com, locate the video you wish to share. Click Share and copy the URL.
- Insert the URL in the YouTube link section of the file uploader.
- Click “Finish.” The document is now shared in the library.
Edit/Delete Library File
- From your chapter website, click on Member Only Content > Chapter Library.
- Click the title of a library entry to open it.
- Once the library entry is selected, you will see the full description and are able to download the file.
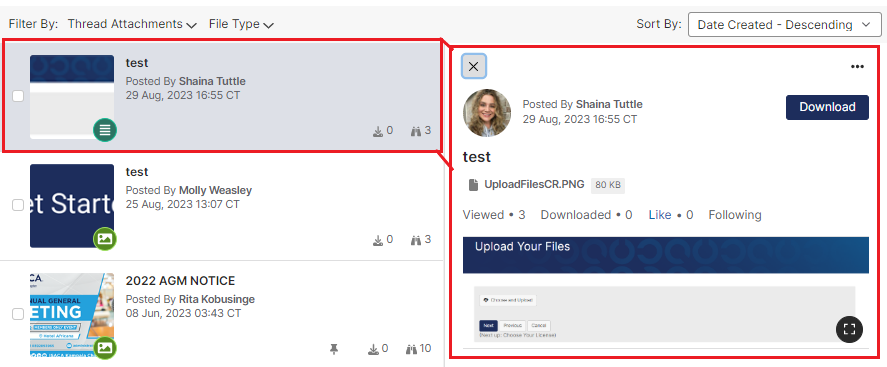
Click the ellipses "..." located at the top right of the Library Entry.

- “Edit” and “Delete” will both appear in the list.
- Edit a library entry at any time (title, description, URL, etc.)
- Clicking “Delete” cannot be undone and will permanently remove the library entry and all associated files within it.
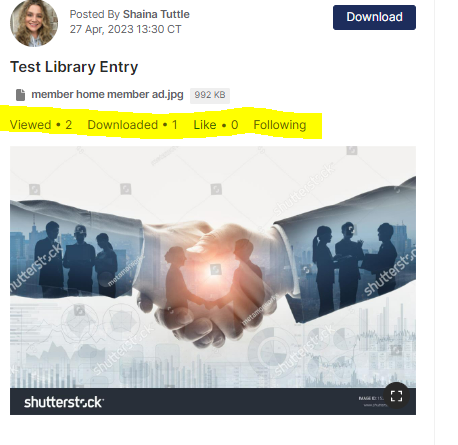
*NOTE: When viewing a library entry, you will see statistics on the number of views, shares, downloads, etc. on the page, as shown below.
Organize Library
Reporting
Limited website analytics is available on chapter websites. To access this reporting feature, site admin should navigate to the site admin toolbar, then Site Options >Site Setup > Traffic. Site admin can then change the filters to a specific date ranger to render the results requested.
Accessibility Guidelines
Accessibility ensures that digital content and functionality are usable by people with a wide range of abilities, including visual, auditory, motor, and cognitive differences. This includes ensuring compatibility with assistive technologies such as screen readers, keyboard navigation, and alternative input methods.
All ISACA digital experiences must conform to WCAG 2.2 Level AA. This standard applies to all user-facing digital products, platforms, and content. WCAG 2.2 Level AA serves as the minimum acceptable level of accessibility compliance.
Site admin can refer to the ISACA Digital ACcessibility Guidelines to ensure your Engage-hosted chapter website is in compliance, however below you will find the key points to refer to:
Structure & Hierarchy
Use a logical, semantic content structure that supports accurate interpretation and navigation.
Visual Design (Graphic Design)
View the full ISACA Digital Accessibility Guidelines here.
Resources | Top
Your Chapter Site
The link for each chapter website is: https://engage.isaca.org/[chaptername]
For example, the ISACA Athens Chapter’s URL is: https://engage.isaca.org/athenschapter
Log in with your ISACA.org credentials.
Your Chapter Leader Community
Each chapter has a Chapter Leader Community that consists of all current chapter leaders for your chapter specifically. You may use this community and its library to share information with your fellow leaders, ask questions and store documents. The Chapter President, Webmaster and Administrator (if your chapter has this role) are the Community Administrators for your chapter leader community. Only these roles can edit content and organize the Chapter Leader Community library. ISACA staff will not manage the chapter leader communities.
There are three ways to access your Chapter Leader Community:
- From engage.isaca.org, click Communities > My Communities > *Chapter Name* Chapter Leader
- From your chapter site, click Member Only Content > Chapter Leader Resources
- From your Engage profile, click on My Connections > Communities
Your Chapter Library
Your Chapter Library can be accessed by any member of your chapter that has logged in. Any member can upload, download, and view documents to the library. Only your site administrator(s) can edit the contents, create folders and organize the library.
To access the library from your chapter site, click Member Only Content > Chapter Library.
Chapter Leader Exchange
The Chapter Leader Exchange is a resource for all current ISACA chapter leaders around the world to network and share solutions about chapter administration and to archive documents and discussions as reference for future ISACA chapter leaders. By creating one global community, chapter leaders can filter their search by tags to find content relevant to their geographic region and/or role without managing multiple community memberships and subscriptions. Only current chapter leaders can access this community; access is removed at the end of your term.
You can access the community either by clicking here or following the steps below:
- From engage.isaca.org, click Communities > My Communities > Chapter Leader Exchange
- From your chapter site, click Member Only Content > Chapter Leader Resources
- From your Engage profile, click on My Connections > Communities
Chapter Leader Portal
This is not hosted on Engage. The Chapter Leader Portal is managed by the ISACA chapter relations team to assist you in your role as chapter leader. You will only be able to access the portal if you are a current chapter leader, and if your role determines access to reports, financial statements, marketing materials, etc.
You can access the Chapter Leader Portal by clicking here or from your chapter site, click Member Only Content > Chapter Leader Resources. You can also access the Chapter Leader Portal from your MyISACA profile (not your Engage profile.)
Costly Mistakes to Avoid
Training is critical! Any mistakes that require the assistance of the vendor to fix may result in a fee which will be deferred to the chapter before correcting. This is uncommon and should not be an issue for anyone properly trained or who refers to these instructions for managing a site.
- DO NOT DELETE PAGES from your site CMS as this can break site functionalities. You have the ability to hide pages that you do not want to appear on your site.
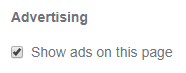
- DO NOT TURN OFF the Advertising on the homepage of your site. ISACA Global controls the ads on the homepage and your chapter may choose to place additional ads on any page.
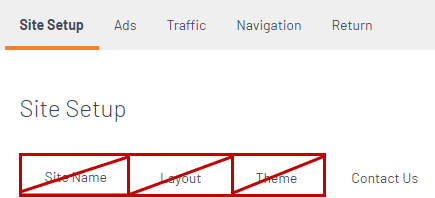
- DO NOT EDIT THE SITE SETUP except for the Copyright section and the Contact Us page. The Site Name, Layout, Theme, and Images have been completed for each chapter site and should not be changed without permission from ISACA Global. It is very important to not change the Site Name, Slogan, or Path Name (aka URL) or your site will not function properly.
- SITE ADMIN ARE ONLY PERMITTED TO USE THE EMAIL COMMUNITY MEMBERS TOOL UNDER THE ADMINISTRATION SECTION AND ALL OF THE EVENTS SECTION UNDER COMMUNITY SETTINGS.
- In the CMS, you will see many items in the navigation and content columns that are locked down and have a padlock icon next to them. These items can only be edited by super administrators of this platform at ISACA headquarters. Please contact ISACA at chaptersiteadmins@isaca.org if you need to request changes to locked items.
If you are unsure if you should edit a specific item, email chaptersiteadmins@isaca.org before editing.
Frequently Asked Questions
- Who can I contact for help with my website or events?
- Who are my site administrators? How do I update permissions?
- Site admin MUST go through the CMS Training and Event Manager Training prior to editing site content or adding/managing event registrations.
- Site administrators will have the permissions to:
- Add events and manage event registration. (Required for chapter compliance starting in 2019.)
- Edit the Engage-hosted website content
- Organize the chapter library, including creating folders for documents available only to your chapter members.
- The Chapter President or their designee may request updates to the site administrators by visiting the Chapter Leader Portal > My Chapter Overview.
- Access to training and editing permissions is typically granted within 2-3 business days.
- Who has access to my chapter website?
- The website and all content other than the Member Only Content tab (as described below) is searchable to the general public.
- The Member Only Content tab is only visible to your chapter members who are logged into the site. Pages other than those listed below are visible to all ISACA Members and not limited only to members of your chapter.
- Member Directory: All ISACA Members may search the directory, but only members of your chapter who have logged in, agreed to the community terms, and have not opted out of the directory will be visible (to the extent they have allowed their profile to be visible.)
- Chapter Library: Only current members of your chapter can access the Chapter Library and all files within it.
- Chapter Leader Resources: Only visible to Chapter Leaders. On this page are links to the Chapter Leader Community, Chapter Leader Exchange, and the Chapter Leader Portal.
- Chapter News: As part of the template provided by ISACA Global, the Chapter News permissions are set to be viewable by members only. The chapter MAY update the view permissions for this page if desired.