Engage Microsite Event Manager Training Guide
Chapters can choose to use the Engage registration tool (Event Manager) or link out to an external registration system, such as Cvent. Adding your chapter events in Engage is required for chapter compliance reporting as well as to maintain the global events calendar, even for chapters that choose not to use Event Manager for registration purposes.
Event Manager allows you to create and manage a variety of event types for your Chapter, from online webinars to large, multi-day conferences with numerous registration options and sessions. Please see below for the Event Manager Training Guide.
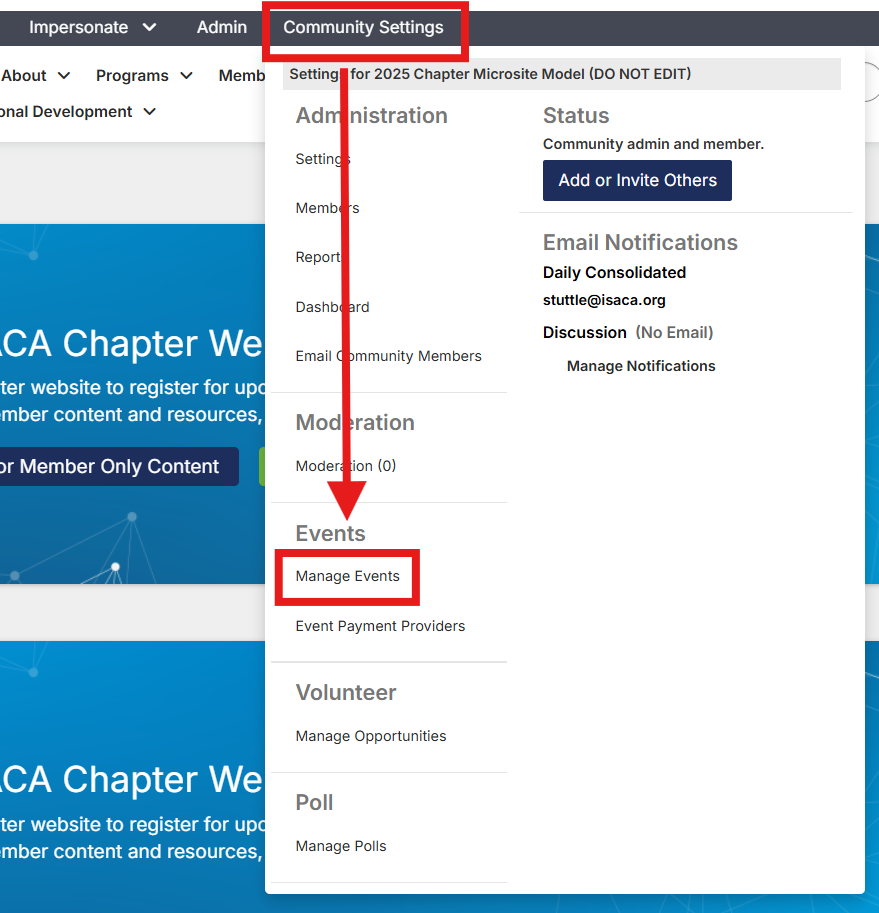
Site admin should always access/edit their events through the Site Admin Toolbar by navigating to Community Settings > Manage Events. This allows site admin to see past, present, and future events.
Event Manager Training
Payment Provider | Top
In order to collect any registration payments via Event Manager, a payment provider MUST be associated with your chapter site. If a chapter does not charge registration fees or uses an external registration system instead, this section can be skipped.
Helpful Tip:
- It is recommended that the site administrator verify the PayPal account set up prior to setting up any events with paid registration collected through Higher Logic.
If a chapter sets up an event that collects payments without assigning a PayPal account, the registrant’s fees will be held for weeks until they are released back without the ability to process. ISACA cannot intervene while the payment is pending. The chapter will not receive the funds.
Each chapter site will have a unique payment configuration, allowing chapters to directly receive their event funds. When you have an active paid event, Higher Logic will never receive credit card data (in full
PCI compliance).
Set up your Payment Provider:
- Login to your chapter website using your ISACA credentials.
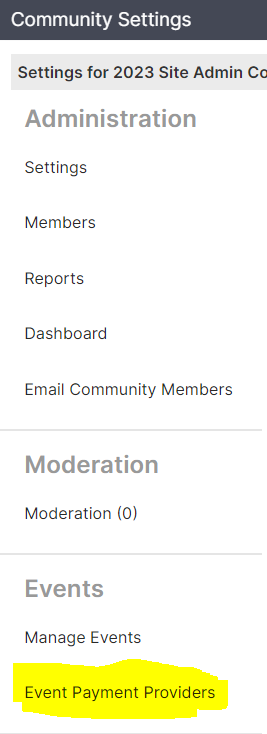
- Click the “Community Settings” button at the top right of your site and then select "Event Payment Providers.”
- Complete the Payment Provider form to accept payments from users registering for paid events.

- Click “Save” once you are ready to apply the settings.
Currency Options | Top
All currencies accepted by PayPal are listed within the drop down menu in the event details set up. If your local currency is not offered, we suggest investigating alternative solutions or contacting your bank about the best way to collect registration fees and convert them into your local currency. If a currency is used that is not supported by PayPal, the chapter and/or the registrant could incur foreign transaction fees so the limited list is to protect all parties involved.
ISACA Global does not manage the currencies that are made available through PayPal.
Create an Event | Top
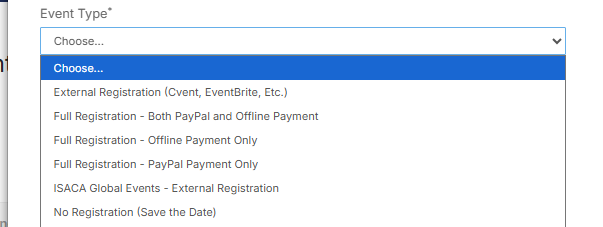
The first step in creating a chapter event is choosing the correct Event Type. The Event Type you choose will populate different event options and functionalities. The Event Type applied to an event is not visible to your site users - this is only information that is needed to know by site admin.
Review the list below to determine which Event Type is best suited for the event you are creating. Once decided on the Event Type, follow the Event Set Up Guide on how to input your information into Event Manager.
| Event Type |
Event Type Description |
Event Set Up Guide |
| Full Registration - Both PayPal and Offline Payment |
Full registration managed within your chapter's Engage site. Members have the option to pay online, via invoice, or at the event. |
Engage Registration |
| Full Registration - Offline Payment Only |
Full registration managed within your chapter's Engage site. Members can only pay off-system. |
Engage Registration |
| Full Registration - PayPal Payment Only |
Full registration managed within your chapter's Engage site. Members can only pay through the payment provider set up on your chapter website. |
Engage Registration |
|
Save the Date
|
No registrations are collected. Members can download the event to their calendar. Admins can use this event type as a "Save the Date" and switch to a different registration type later on. |
Save the Date Event |
| External Registration (Cvent, EventBrite, Teams, etc.) |
Event details will be displayed on your chapter's Engage site, but no registrations are collected through Engage. Members will be redirected to a link that you provide to register. |
External Registration Event |
| ISACA Global Events - External Registration |
Do not use this Event Type for chapter events.
This event type should only be selected if you are wanting to promote an ISACA event on your chapter website.
|
|
Below is a screenshot of what you will see when selecting your Event Type in Engage.
NOTE: If you link to a registration site outside of your chapter's Engage site or choose no registration, the registration details will not show in the user’s “My Registrations” page. If you set the registration to full registration, a user who registers will see the event listed on their “My Registrations” page when logged in. Also, event registration types that do not appear on the “My Registrations” page will not be included in reporting and chapter leaders will need to manually report on these events and attendees.
Event Email Templates| Top
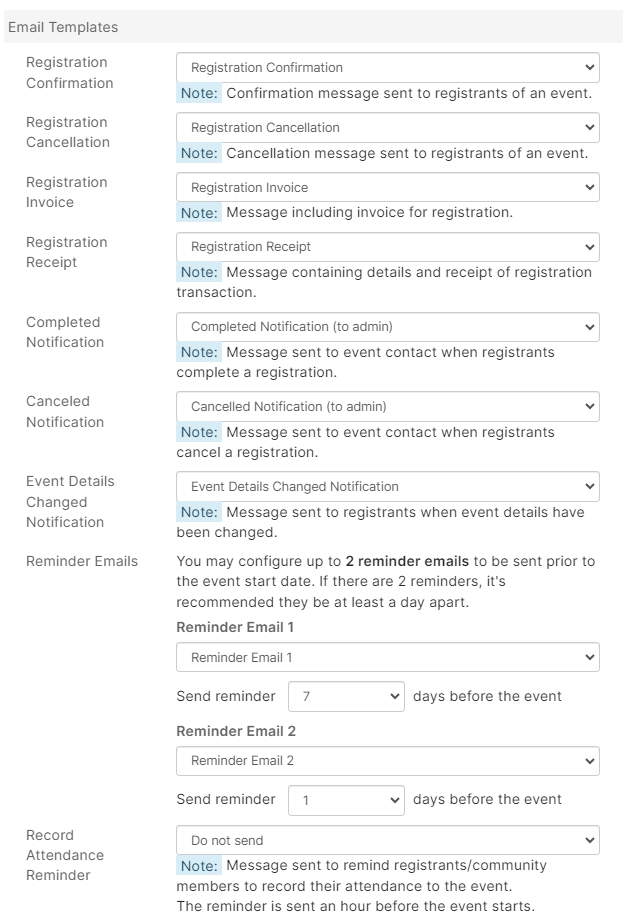
The email templates will prepopulate with your event information and align with the correct action for each template automatically depending on the Event Type you choose. Email Templates cannot be edited by site admins. This functionality was opened up for site admins so that you can determine when and if reminder emails are sent OR if event contacts should receive notifications.
Only one email template per action exists; the site admin should only change the email template to "do not send" if they wish to not send that specific email.
| Email Templates available for Engage Registration |
 |
| Email Templates available for External Registration |
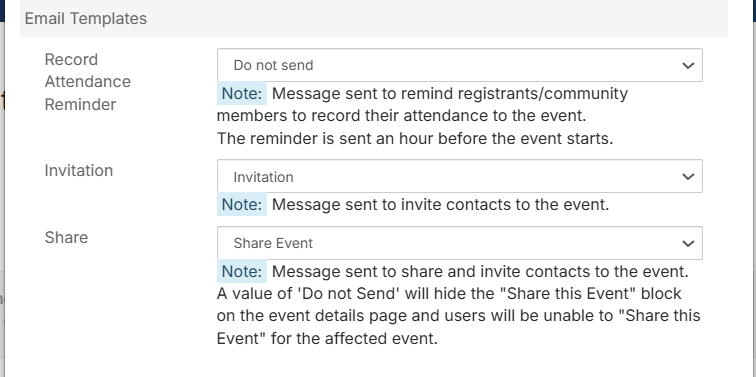
|
| Email Templates available for Save the Date Registrations |
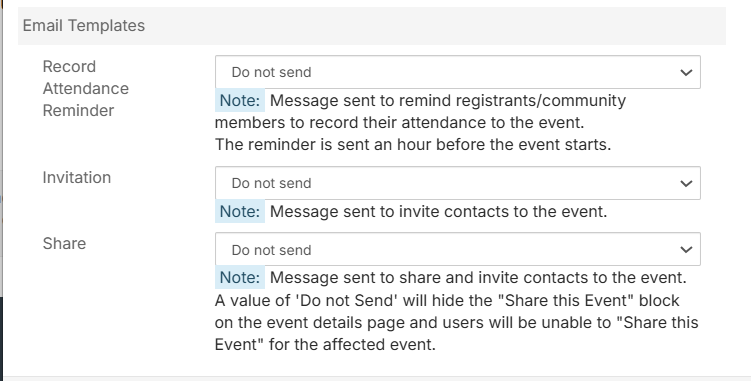
|
Only one email template per action exists; the site admin should only change the email template to "do not send" if they wish to not send that specific email. The email templates are saved in the Chapter Leader Exchange Library as reference.
Helpful Tips:
- Notifications that go to the user include registration confirmation, receipt, details changed, reminders, etc. – review the note below each template field to see when and to whom this email will be sent.
- Notifications that go to the event contact include (to admin) in the title. You may choose to set these notifications to “Do Not Send" if you do not wish to receive those notifications.
Invite Members to an Event | Top
Site admin have the option to invite all chapter members or specific members only to an event from your website. Chapter members can opt out or manage their email preferences within their Engage profile.
To send invitations for an event that has already been created:
- Click on the “Settings” button.
- Click on “Invite Members to Events.”
- Choose the event.
- Choose if you want to send the invitation to all chapter members or to select members.
- For “Specific users” begin typing the names of individuals you want to invite and if they are
a member, their name will appear in a drop-down. Click on who should receive the invite.
- Click “Send Invitations.”
- “Cancel” if you don’t want to send any invitation emails.
- Unfortunately, in the Higher Logic system, there is not a way to send invitations to all but an excluded list of members.
Registration Choices and Session Categories | Top
Event Tags | Top
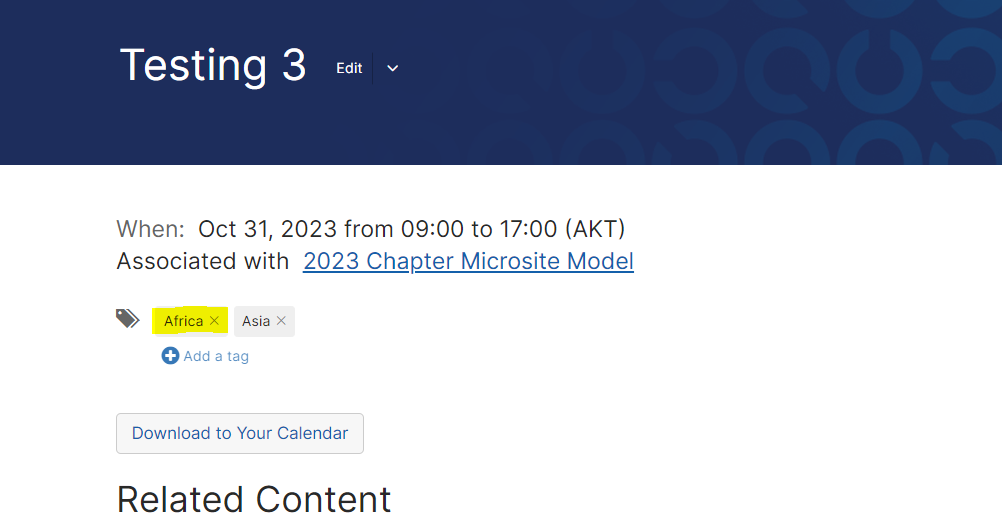
Once your event is created, you are able to add Tags to your event. Tags are used to categorize events by region so that they are easily searchable on the Global Events Calendar. This will help your event reach a broader audience.
To add a tag to an event:

- Select the Tag that best fits your region.
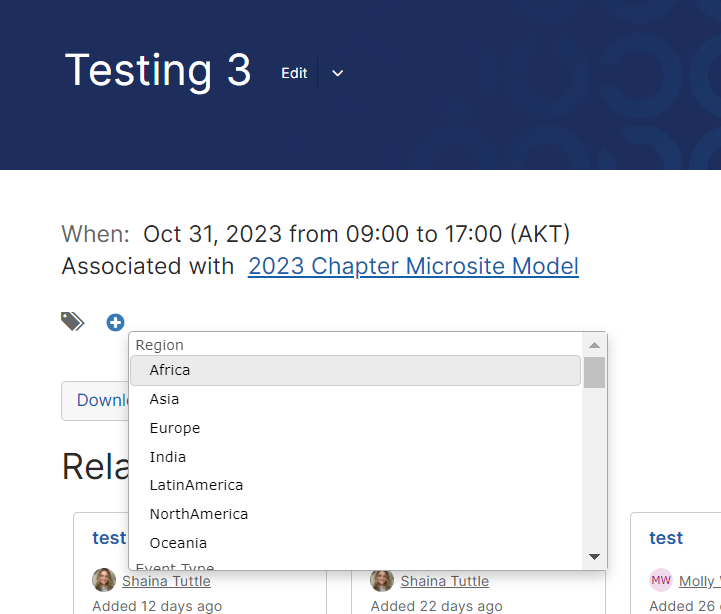
- If you want to remove a tag, click the "X" to the right of the region name.
Manage Events and Pull Reports | Top
Click “Community Settings” at the top right of the web page. Under Events, click on “Manage Events.”
Here you can see a list of your chapter’s events. You can apply filters to sort by Event Types, Past Events, Date, and more – you will notice there are many ways to filter your events to narrow down what you see.

The title of an event will always be a hyperlink that you can click on to open the event for review and editing under the Details Section. Here you will also see the Registrants for your event. You can click on these numbers to see who registered, paid, cancelled, etc. Under Actions you will find the "Edit" button. “Edit” opens the event in edit mode so that you can make changes. The drop-down arrow will show other options (varies depending on Event Type):
| No Registration: |
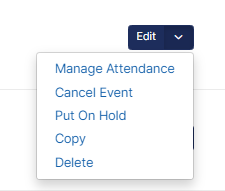 |
Full Registration: |
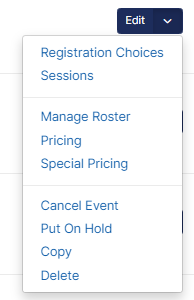 |
-
-
- Cancel Event – cancelling an event will allow it to still be visible on your site but it will show a Cancelled icon so that users know it has been canceled.
- Put on Hold – this will change an Active event to On Hold. This can also be changed when editing an event using the toggle at the top right of the pop-up window. You can remove the hold to reactivate an event in this same way. If an event already has users registered, you will not be able to put it on hold.
- Copy – allows you to copy the event to create an event with the same details that you can then edit and change the date or title or other details for quick creating of similar events.
- Delete – deletes the event entirely from the chapter’s list of events so it can no longer be found on the site or via search, even admin will not be able to access deleted events so be sure you need to delete before doing so! Another option is to put an event on hold, so it is not visible to users.
- Manage Roster – this is an important report that shows who has already registered for the event, you can filter the report and export it, it will include payment summary details.
- Sessions Report – see details for and number of paid registrants for any session options that were created as part of the event.
- Choices Report – this will show attendees and the add-ons and session options they selected and what the cost of each is; you can export this report.
- Pricing – this is the only place you are able to edit the pricing details of an event after it has been saved on your site, whether active or on hold. It is advised not to make pricing changes after users begin registering.
To export a registration report through Event Manager, click on the down arrow next to edit in the Manage Events Section. Then click on “
manage roster.”
Click on “
Export" to export the Event Roster and all its information. If CPE credits are being issued to attendees after the event, the appropriate chapter leader can copy this information into the CPE Upload Tool template (found in the Chapter Leader Portal) and follow the instructions to upload the CPE credits.

You are not required to use Event Manager for registration. You are welcome to use a third-party registration tool such as Cvent or EventBrite. You are still required to enter in your event details on your chapter's Engage site through Event Manger for reporting purposes and chapter compliance. Events can be added on your site with a date in the past for reporting purposes only. You should include the registration and attendance information within the description of the event and any relevant details, including board members, speakers, and sponsors who attended. Site admin can see all past events for your chapter in on the Manage Events page by filtering for “Past Events.”